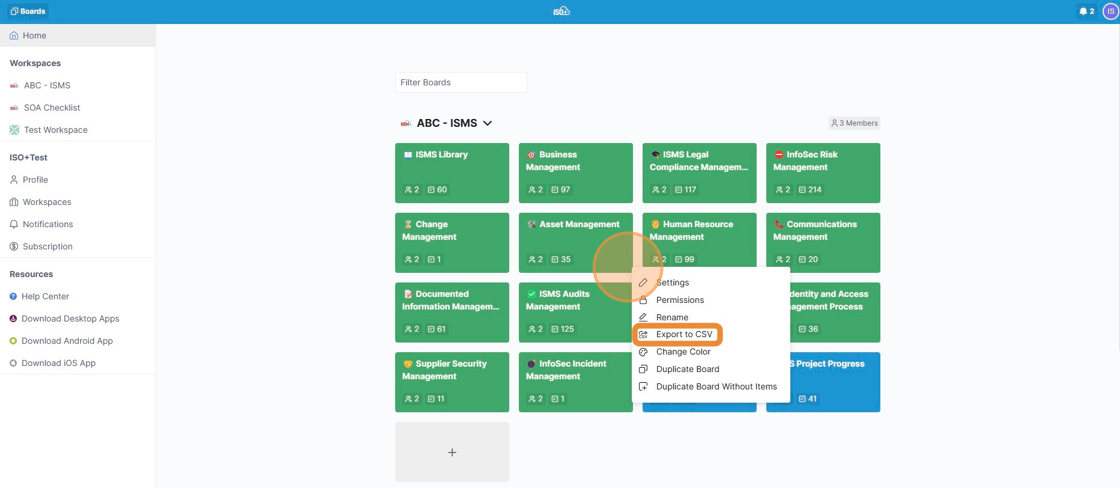
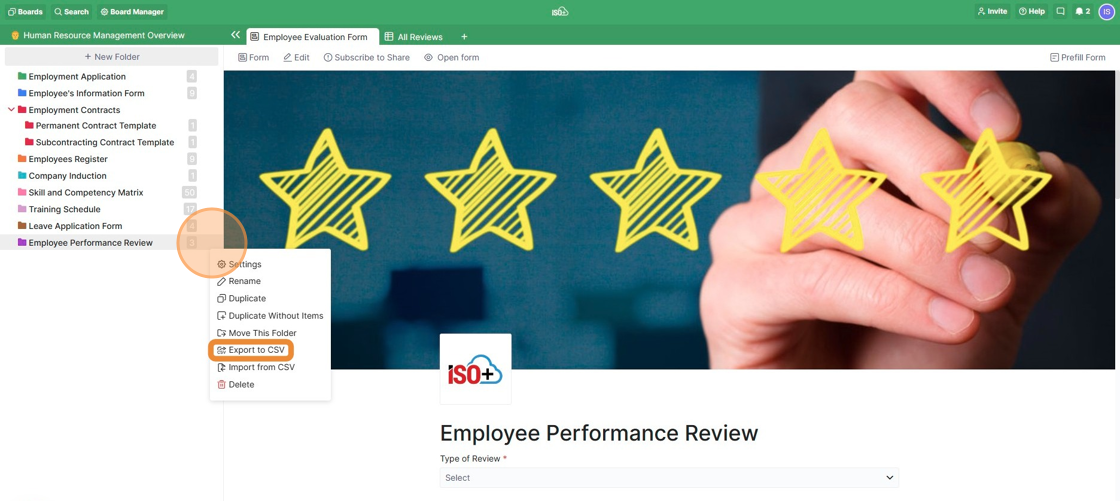
CSV Import and Export
📌 NOTE: Depending on your role and permission level, some of the following features might not be available for your account.
So, whether you have an important Excel spreadsheet you’d like to use or a file from another tool, you’ll be able to import it and reorganise it in ISO+™.
Import a CSV File
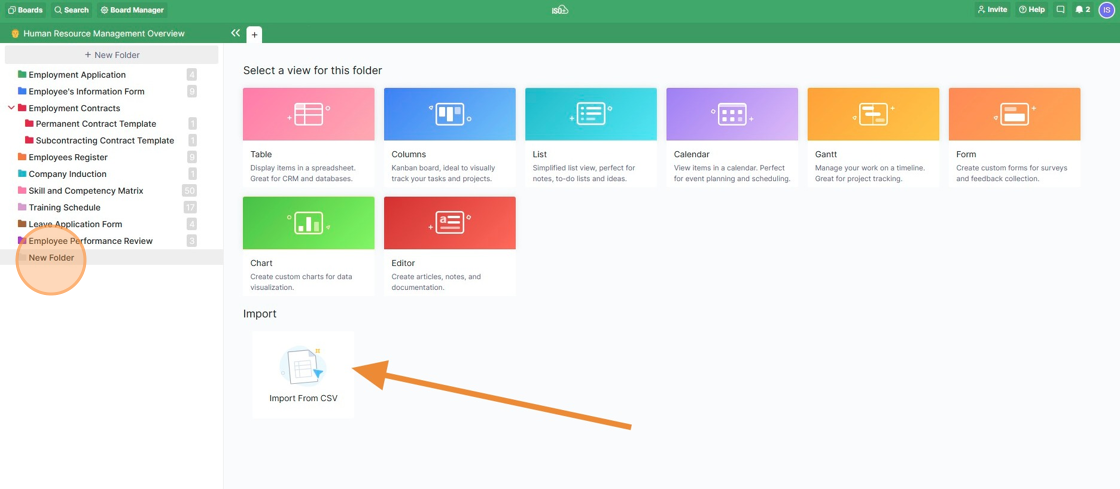
Click on the Import from CSV button. You will get a pop-up window where you’ll upload your CSV file into ISO+™.
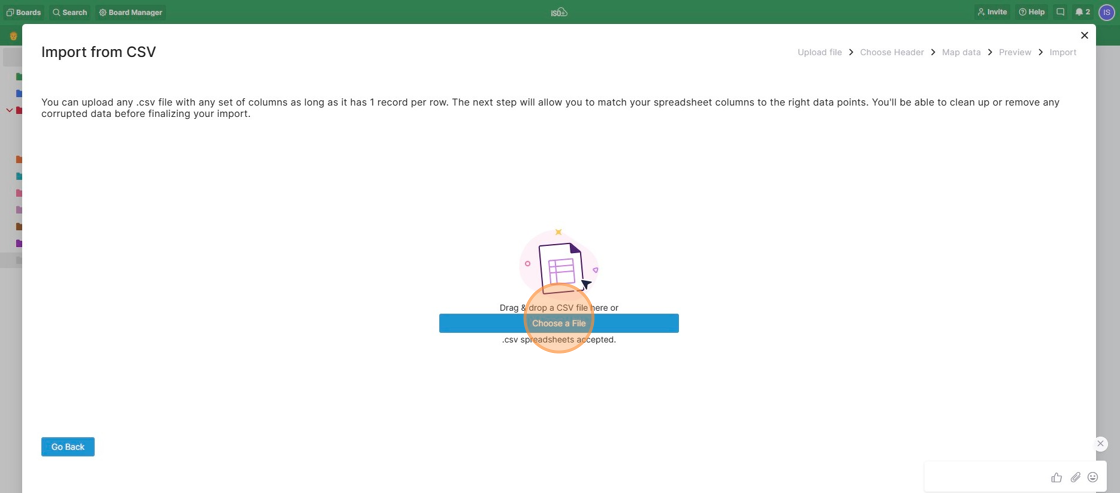
In the next window, you will get to choose a header for your imported table. When you’re ready, click Continue.
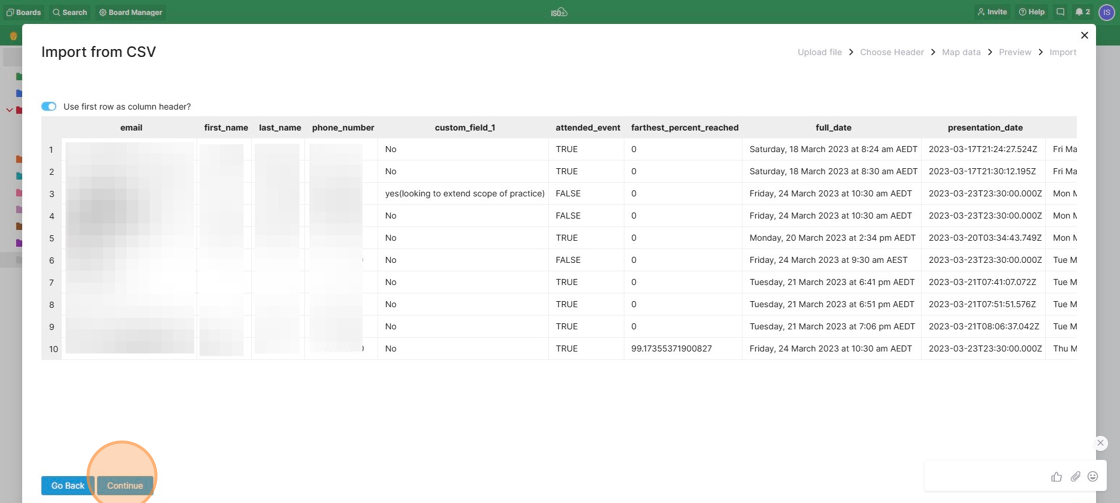
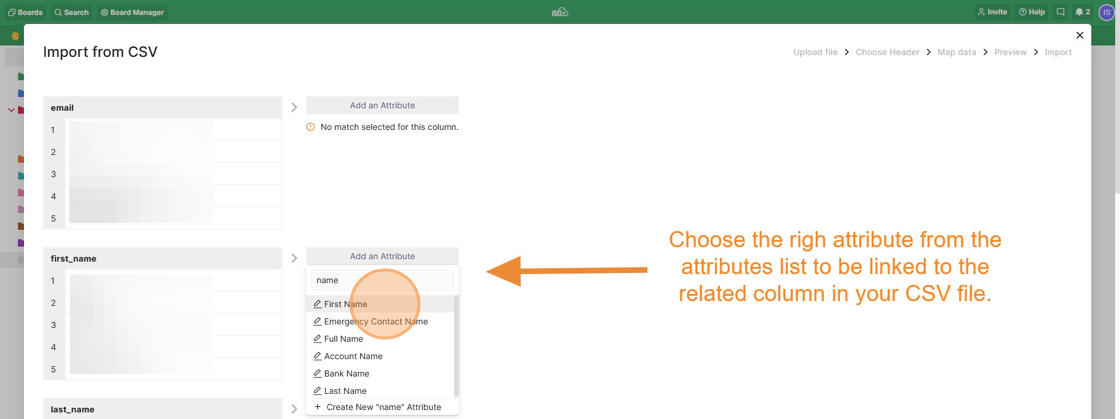
In the window that opens up, you will get to map out your data by using attributes in our database.
You can also decide right here which columns you want to see and which ones you don’t.
The columns that are not linked to an attribute will not be imported.
If you get a green checkmark next to your column with the text “All values pass validation for this field”, then you can proceed.
In case there’s a red exclamation mark with the text “# of issues found”, then you’ll probably need to edit your CSV file or change the attribute.
Once you’re done, you should be able to click on the Continue button. In case there are some errors, you won’t see the Continue button at the bottom of the screen.
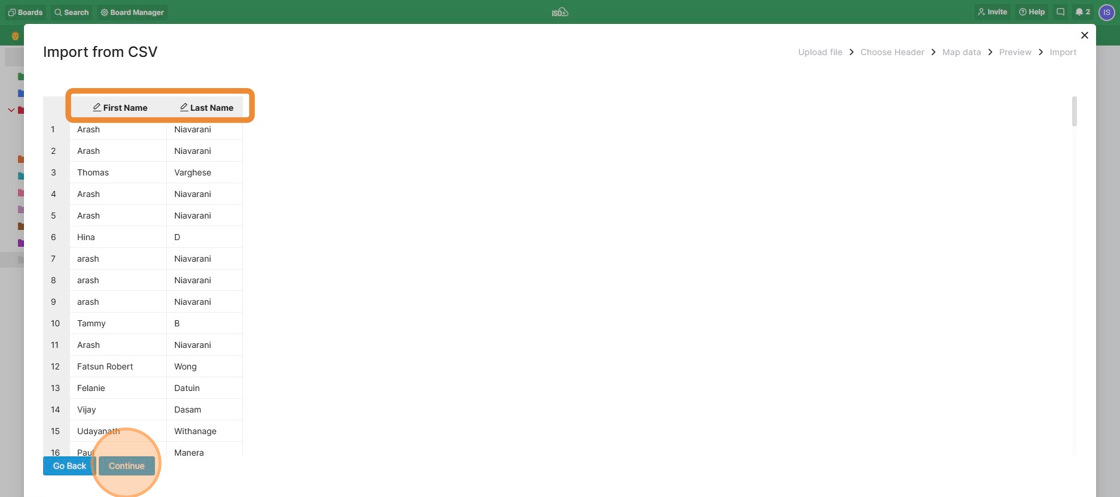
In the next window, you will get a preview of your table. If you’re satisfied with how everything looks, continue to import.
It might take a few moments for the import to be completed.
Once it’s done, you’ll be able to edit your table further.
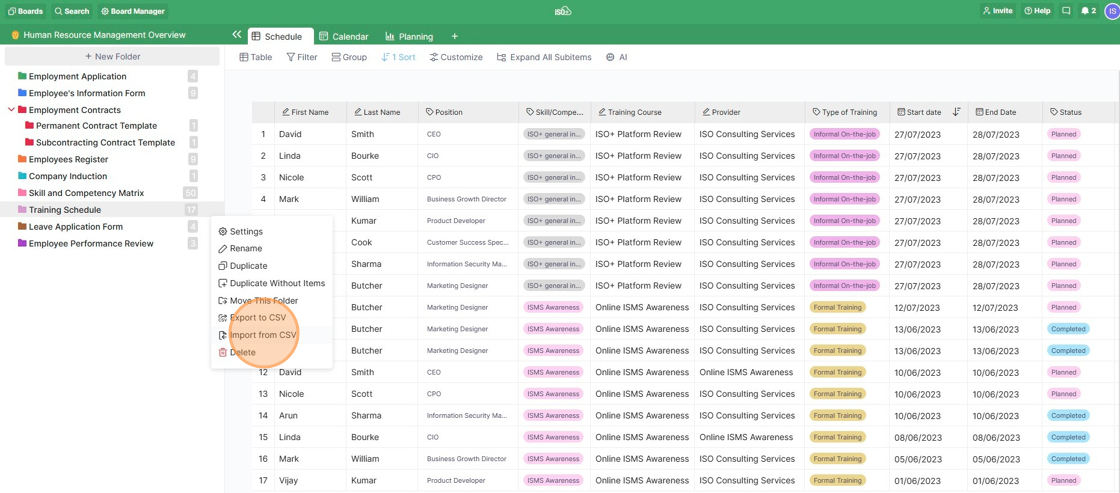
You can also import a CSV file to an existing folder/subfolder.
Hover over the board and click on the three dots that appear in the bottom right corner of the board. Choose the option Import from CSV.
b
Export a CSV File
